Polaris IQR Fuel Tank and Air Box reinstallation tricks |
|
|
| Please take a few minutes to read through all of these notes. We have countless hours in research and development to bring all of this information to you. All we ask in return is that you make your purchases with us so we can continue to expand this site. If you still have questions that we have not answered on these pages then please click on the link to the left for tech support. |
Fuel Tanks/Air Box fit
The plastic expands over time. Every time we reinstall a tank we have to drill 2 new holes or turn the old holes into slots. Not only do the holes need to be further back but also slightly wider. We've had some that had to go back almost an inch. If you try to ram the tank forward you will just be pushing your front bracket forward making the air box even harder to get in. We like to install a 1/4" thick battery pad or other hard rubber pad under the front of the tank to space it up just slightly. This helps you get the air box in and out easier. Also, we do sell the stud kits for $10 but what we recommend is the pan head screws for $2. If you install the tank stud kit, the studs in your track may hit the tank studs and rip out of your track. The normal tank bolts can have the same effect so go with the pan heads. You can also shim the rear motor mounts to make it easier. On the 440's you can carefully remove the hoses on the solenoids and swap them 180* or reverse all of the plastic fittings on the solenoids and then they will drop down in behind the cylinder and not get in the way while you install the air box.
600 Air box mod
On the 600's, we also use the 600HO carb boots that stay in the air box. The stock ones are extremely hard for most people, including us to get on. Many times people think they have them on all the way but they aren't and the air box winds up only partially on and cuts into the boots. If you remove you boots you can usually see the marks where it was not on. Some of the air box plastics are not the same thickness around the holes and will need to be shaved on the inside of the box until the thickness is about an 1/8" Then you can properly install the new boots. Some air boxes are already perfect. We use a router with a bit extended about 3/16" past the bottom and carefully run it around the hole. Clean out the shavings. Apply a very thin layer of grease to the inside of the boots and they will slide right on.
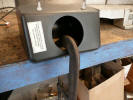 c clamp to workbench | 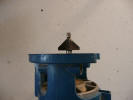 router set up | 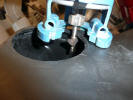 running the router | 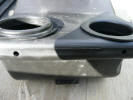 boot difference |
Buy the boots here
| Back to the Polaris IQ parts and accessories page |


